January 04, 2008

Jargon

I've been ill for most of the past year, and haven't been working on the project.

Having, however, recently undergone surgery which seems to be working, I expect to be back at it in a month or so.

Just because I haven't been able to work on the model doesn't stop me from reading up. I've read and re-read everything I could get my grubby mitts on, and have increased both the depth and breadth of my knowledge, including the specific jargon related thereto.

Here, then, are the Top Ten words/phrases that sound like they may be rude/dirty, but aren't, when used by shipwrights:

10) three butt shift
9) spanker
8) catharpins
7) "worm and parcel with the lay, turn and serve the other way"
6) deadwood
5) snotter
4) butt chock
3) vang
2) dolphin striker
1) futtock

Thanks, I'll be here all week. Don't forget to tip your waitress.

[Cross-posted at my main site.]

April 16, 2007

Finishing the Hull

The deck and bulwark planking having been finished to my satisfaction, I could finally turn to the hull exterior.

First, though, I drilled and shaped the hole through which the rudder head would extend above the deck; the rudder itself had yet to be addressed by the kit instructions, but I found it in the kit box and shaped it to fit properly through the hull.

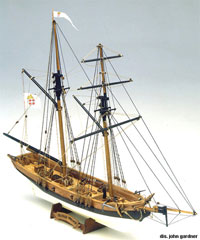
I chose not to make any changes to the color scheme depicted on the kit box art — stained wood from the wales up, black from the waterline to the wales, and white below the waterline.

Prime. Sand. Repeat.
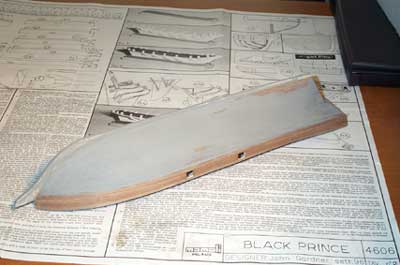
Relying on my vast model-painting experience, I free-handed the primer up to the lower edge of the wales. Sanding followed, revealing some flaws — bumps and divots, mainly — in my planking job, which were corrected with additional block sanding, or with thin applications of filler as necessary. This process was repeated twice, until I was satisfied that the hull was ready for paint.

I started with white paint, from the keel up to within about 3/4" of the wales; on white, it would be easier to mark the delineation between black and white areas; I figured it would also be easier for the later black paint to cover the white than vice-versa.

The white I used didn't give me the opacity I wanted, so it took three coats to get a solid white base on which to work. After allowing the white to dry/cure for a few days, I gave it a coat of clear varnish, which I allowed to cure for a week.

I ticked off the waterline with soft pencil and then masked it with painters tape. The thorough drying of the white paint and varnish allowed me to burnish the low-tack tape down such that there would — I hoped — be no opportunity for the black paint to seep or bleed under the edge of the tape, and would later allow me to remove the tape without pulling up any of the varnish or white paint.

As with the earlier primer, I free-handed it up to the lower edge of the wales. The black paint had better opacity — only two coats were needed to cover the primed wood well.
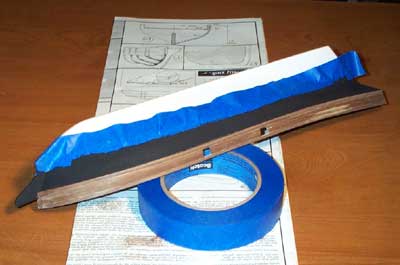
After a couple days of drying, I carefully peeled off the painters tape, revealing only a couple spots of "bleed" which detracted from the crisp painted edge. These were easily but ever-so-carefully corrected by light scraping with a very sharp new #11 X-acto blade; the varnish atop the white paint really paid off there.

The entirety of the painted portion of the hull then received two coats of varnish, and the bare walnut above the wales received an application of stain.

The rudder was masked and painted it the same way as the hull.


The hull being basically complete, we will next turn to the deck fittings.
February 06, 2007

Just When You Thought The Planking Was Finished

I've been model-making rather than writing. I'm horrible. So anyway....

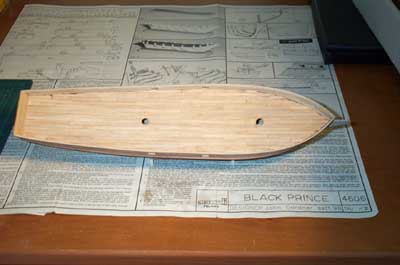
The hull planking having been completed, I next turned my attention to the deck planking.

The supplied material — .5mm x 4mm strips of something neither basswood nor walnut... maybe tanganyika wood — was a bit disappointing; the color tone was inconsistent, and the edges were somewhat rough due to the coarseness of the grain. I ganged the strips together and mass-sanded the edges, which got them close enough to what I wanted, but because (as usual) there was barely enough supplied to do the job, I had to be careful not to sand too much away.

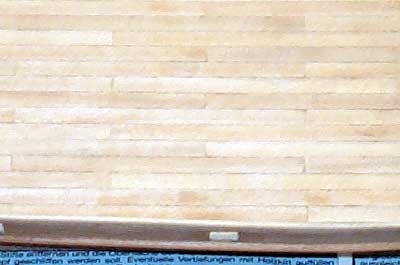
I then cut all but one of the strips into 75mm segments (the length being decided upon arbitrarily) and, using a #2 pencil, blackened one edge of each strip to simulate the caulking that was historically hammered into the gaps between planks in order to waterproof the deck.

Using wood glue rather than cyanoacrylate, I ran the one uncut strip down the centerline of the deck to use as a starting point for the rest of the planking, and then filled in the rest of the deck, offsetting each row of planks by 25mm to create a "three-butt shift" — ensuring that no two adjacent planks ended at the same spot. I also made sure to trim out the holes for the masts before I completely covered them over.

I was correct about the amount of wood supplied for the deck planking; there wasn't a single extra strip left over.

When the deck planking was complete, I sanded and scraped it smooth, and applied three coats of varnish, lightly sanding after the first and second coats.

I then rough-cut the gunports, bent and installed the waterways (sorry, too small to photograph) and then installed the inner bulwark planking and finish-cut the gunports.

Next: finishing the hull.

January 19, 2007

Second Planking

The spare basswood and walnut strips arrived from Model Expo, and were a pretty close color match to those supplied in the kit — though, being sized to imperial rather than metric measurements, the walnut was a tad thinner and a skosh wider than the original .5x4mm strips. The basswood was a pretty close match.

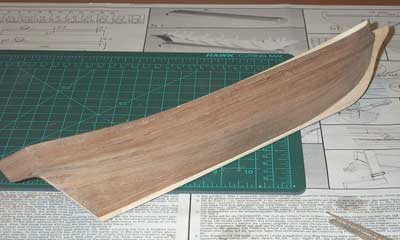
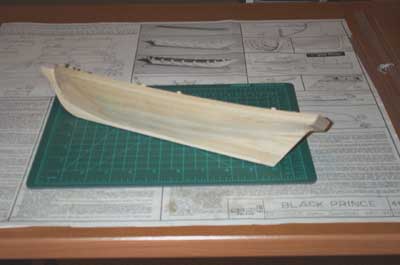
It was a bit tricky to glue the basswood strips edge-to-edge to the top of the existing bulwarks, even with the tip-tops of the frames to aid in alignment. The problem was that I'd already done the exterior planking in walnut (see the picture here) so the 1mm thick basswood had to be lined up properly on the edge of a 1.5mm bulwark. I solved the problem by glueing the edge of the basswood, getting it approximately lined up, and then using scraps of .5mm walnut as shims while applying every single spring clamp in my collection. I'm pleased by the results.

The second planking then continued, three plank widths above the false deck and all the way down to the keel. More accurately, I worked from the top down and the bottom up, meeting approximately mid-way down.

I spent a lot of time fitting the second layer walnut planks, particularly at the joint where the planks meet the stem — it's a lot of fiddly work with very sharp X-acto blades and small rasps. I paid a lot of attention there as I wanted to minimize the amount of wood filler that's going to be needed before sanding and painting the lower hull. As expected, the planks needed tapering at the bow, and a couple of stealers were needed to fill in some gaps at the stern.


[Click for larger.]

I'm not terribly happy with the contour of the hull right above the keel and abaft the stem, but the frames and drawings all seem to indicate that I got it right.

Though they don't show up well in this picture, the wales have also been installed. A fair amount of soaking was required to get them to bend around the bow properly.

January 10, 2007

The Things You Learn....

I discovered this evening that the cat really really likes head-butting things.

Perhaps it would be best to not allow her up on the work table.

Continue reading "The Things You Learn...." »

January 07, 2007

Oops

I'd put on the top two strakes of the second planking, and was getting ready to stick the wales onto the hull, when something struck me as odd. The bulwarks didn't seem to be high enough, even though the instructions and drawings were clear that the bulwarks should be two plank-widths high.

A look at the box cover art seemed to show the bulwarks as three planks high. Uh oh.

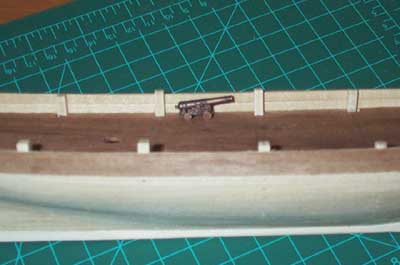
By way of confirmation, I used a cannon to check the height. . . .

There's just not enough height there for the gun ports — and there will be even less when the deck planking is added. Uh oh.

Now, as is usual (I'm told) with kits, the planking supplied is just barely enough to do the job. And sure enough, I'd used every stick of the basswood for the first planking, and right now I'm thinking the walnut supplied for the second planking is going to be barely enough for that task.

So, what do do? I need to add another level of planking on top of what's already there, but I haven't the material.

Well, there's always Model Expo....

The additional timbers should be here by the end of the week.

January 05, 2007

Necessity is a Mother

With the second planking ready to commence, It occurred to me I would need to prepare the wales in advance.

When doing the first planking in 1mm basswood, bending planks was not a terribly difficult obstacle to overcome. A couple hours' soak in water, and they were flexible enough for me to bend by hand or with a crimper... not that there was much bending needed on this particular hull form.

The second layer, of .5mm walnut, seems not to need much coaxing at all for the planks to bend properly.

The wales, which helped to stiffen ships longitudinally, are necessarily thicker and heavier than regular planks. Being 2mm walnut, they are also more prone to breaking. Because of this, I needed to take additional steps to get them bent — without breaking, of course. So, I gave them a 24-hour soak prior to bending.

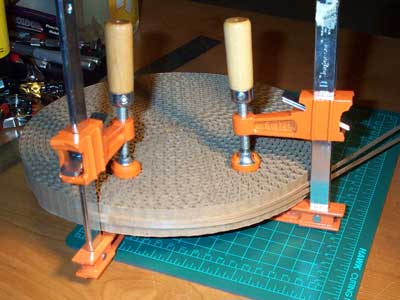
But then I realized that for the bend to set, I would need a form of some sort to which to clamp the wales as they dried. My eyes lit on a shape that looked to be the right size. . . the corrugated cardboard insert for a kitty scratcher.

Perfect.

January 03, 2007

First Planking

The first layer of planking has been completed, and the hull sanded fairly smooth.

Somewhere along the line, I got the fairing off a bit, which left a bit of a hollow on each side of the bow. That necessitated the use of about 1/16" of wood filler. I do take some small comfort in the knowlege that the hollows on either side were nearly symmetrical.

Onwards now to the second planking, in walnut. It'll be puuurrrty.

December 06, 2006

Still Here

I had to take a bit of a break from the Black Prince, but I've resumed construction.

August 01, 2006

Planking Continues

At this point, it might be a good idea to repeat the motto of smart model shipwrights:

I will be familiar with the instructions, remember that they might not be in proper order, or as clear as they could be, and at each stage in the process will consider the implications of later steps.

Yes, there was a hitch in the planking while I tried to figure out how the stern planking runs. Unfortunately, there's no drawing, and the instructions are somewhat opaque, so the final result may not be exactly what the designers intended. I did have to take one step backwards, but I think I'm on track again now.

Oh, well. I'll make it work. I am an engineer.